Creating your first repository
Creating your first repository
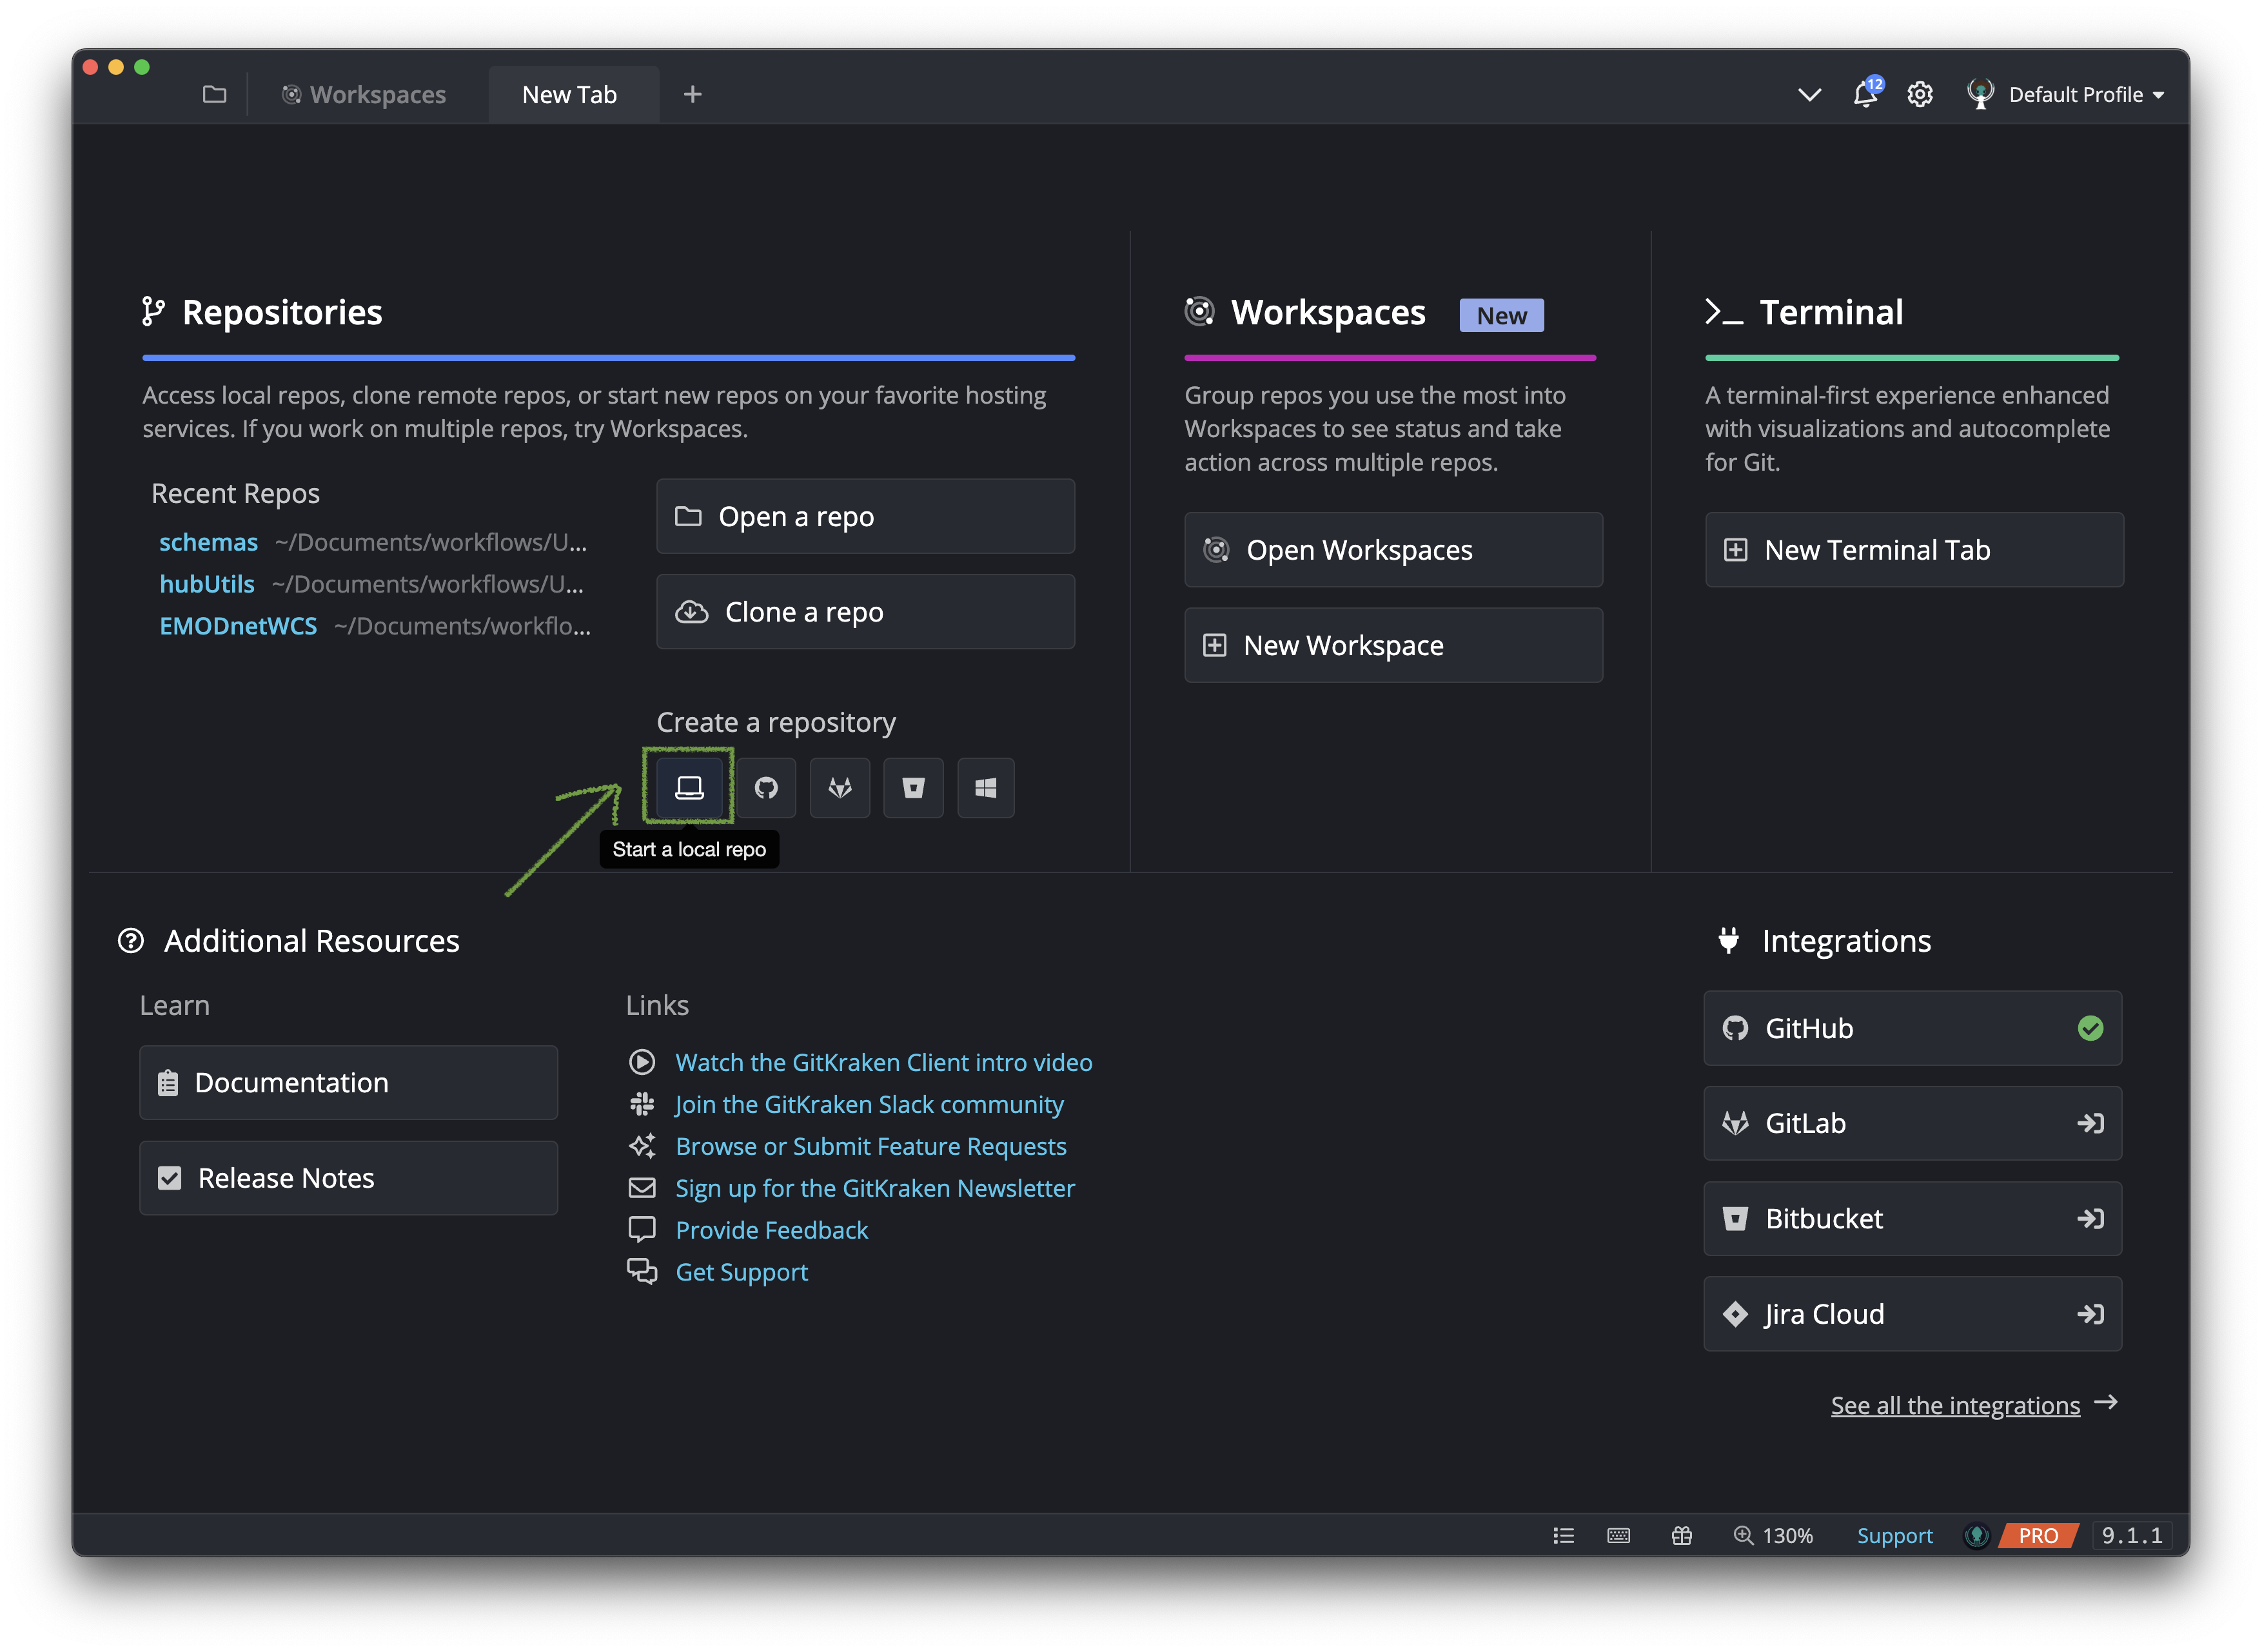
When a local directory becomes initialised with git, a hidden .git folder is added to it. It’s now called a repository. You can initialise an existing project with git or a start with a completely new project. We’ll start by creating a new repository.
-
In GitKraken Client, make sure you’re logged in to GitHub.
-
Create a new local repository. Either:
- Go to
File > Init Repoin the menu. - Click on icon under Create a repository.
- Go to
-
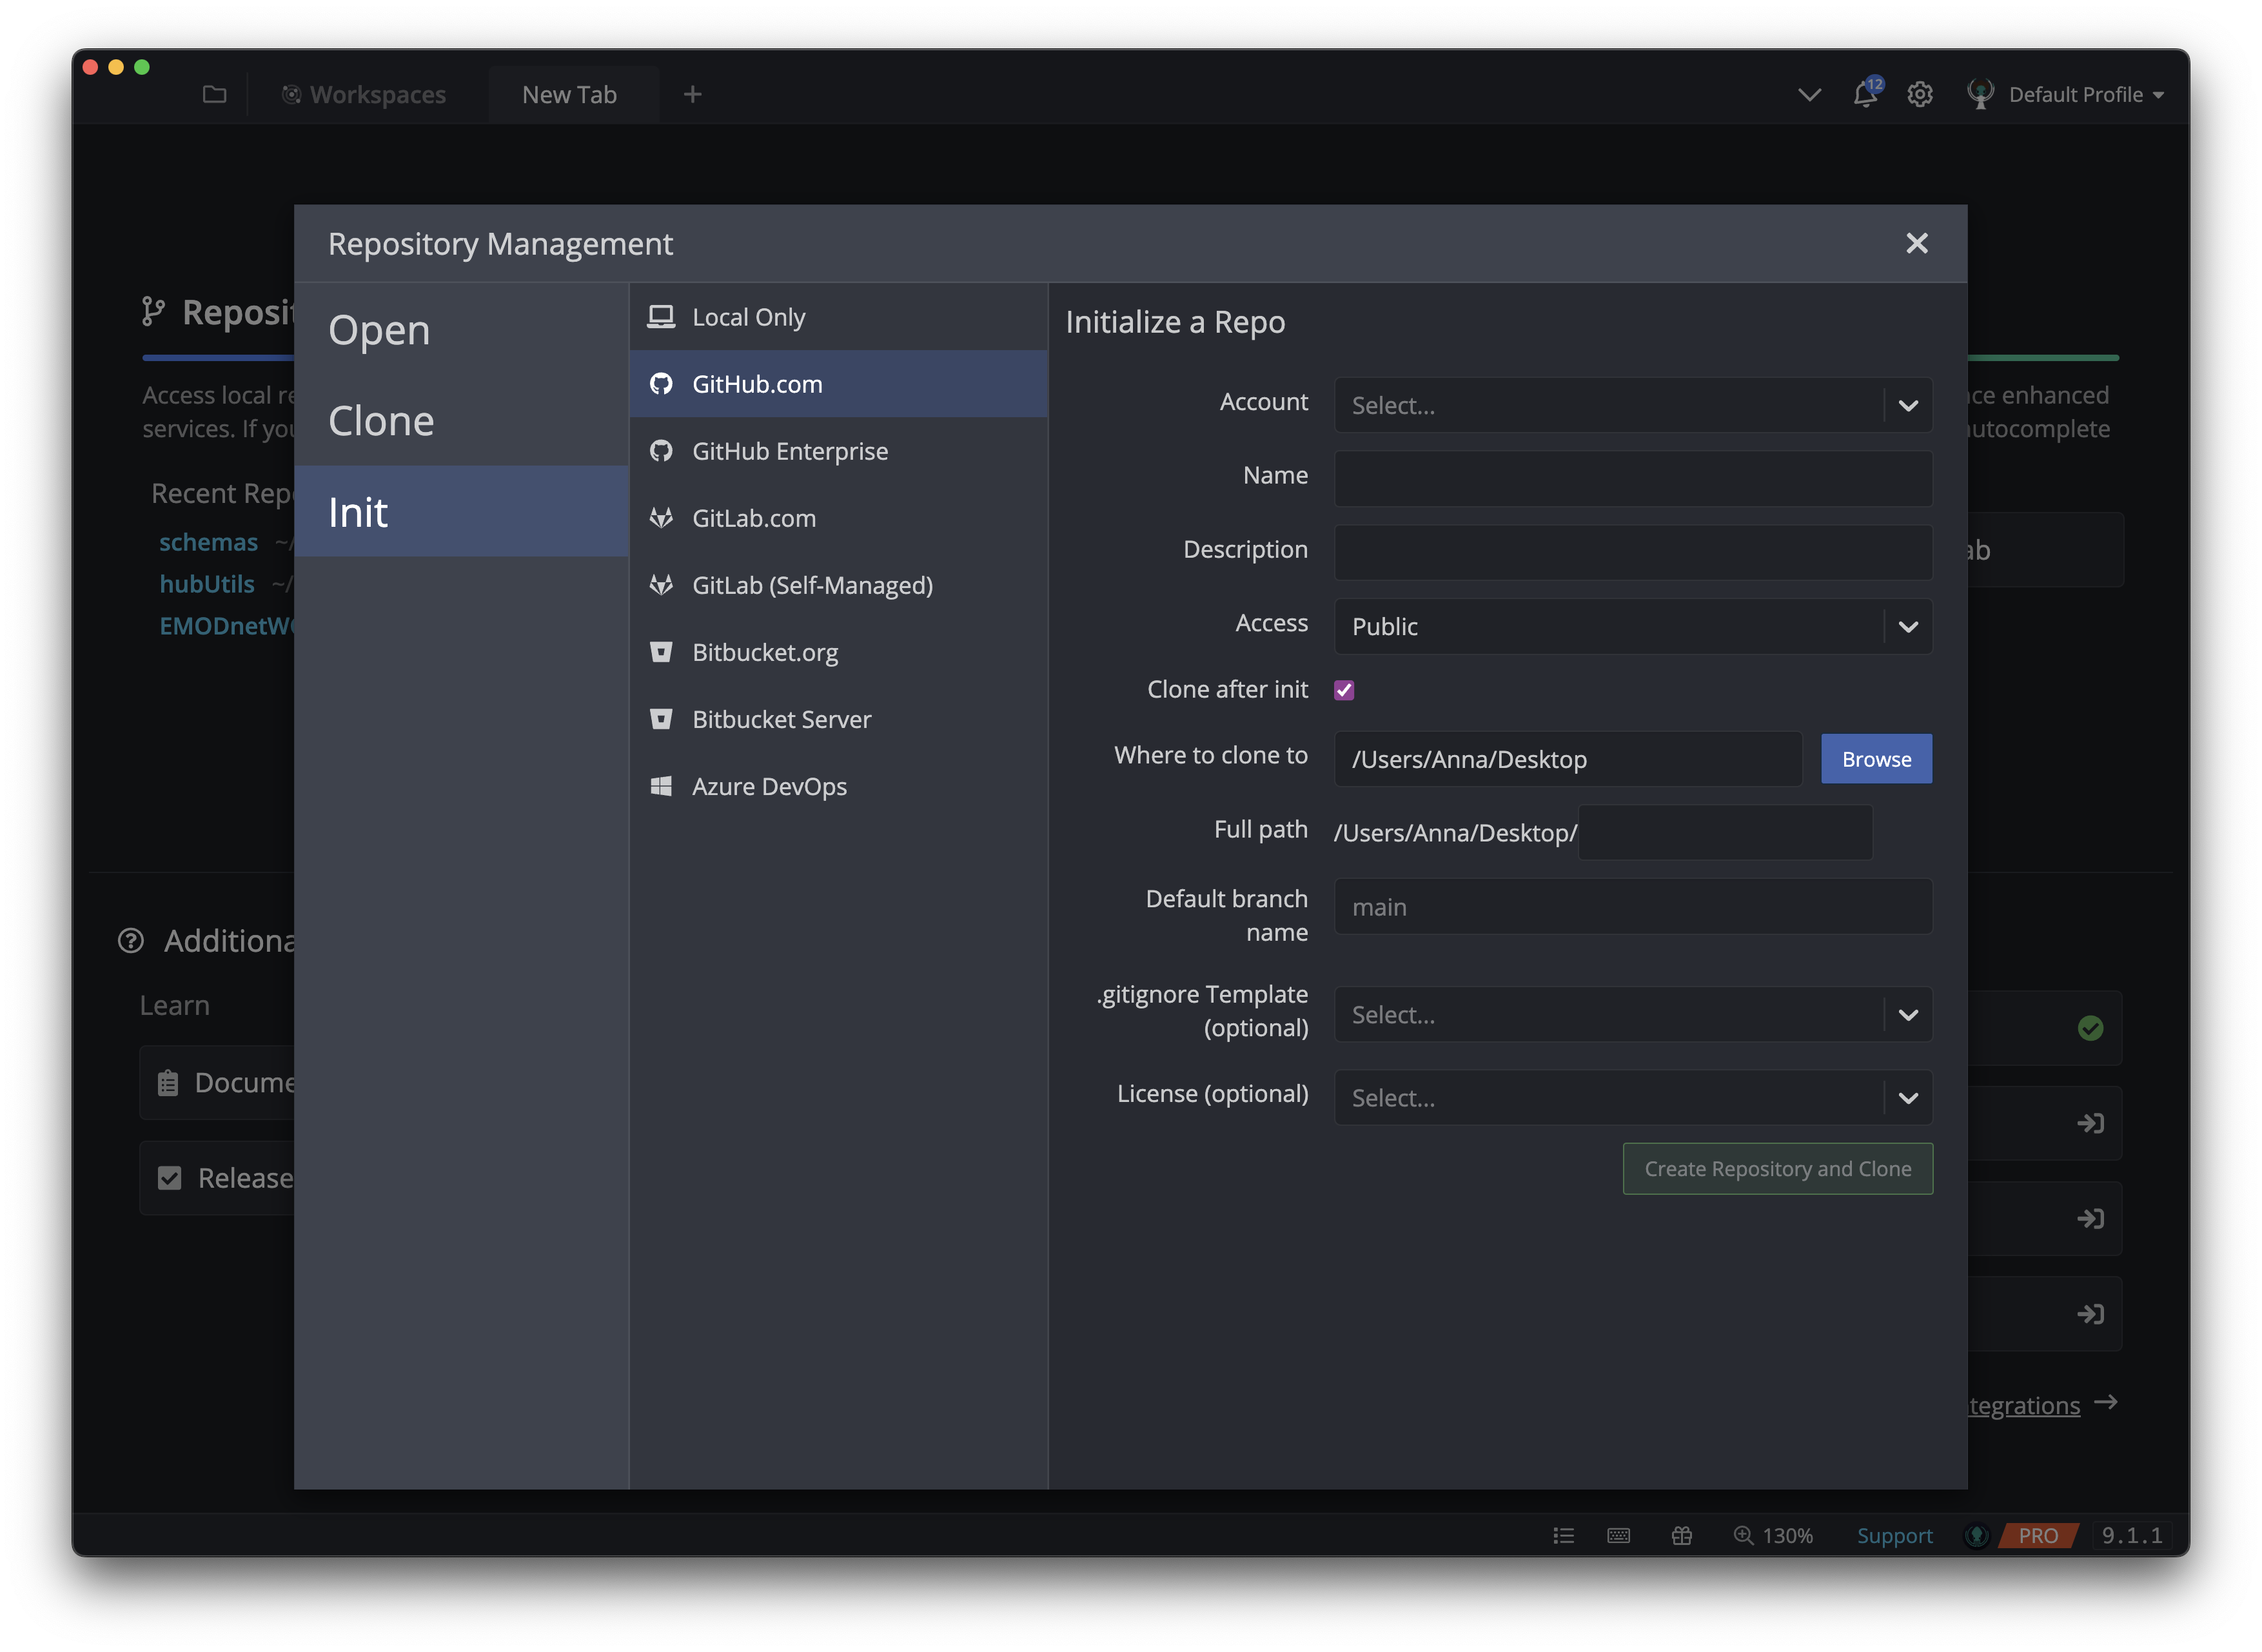
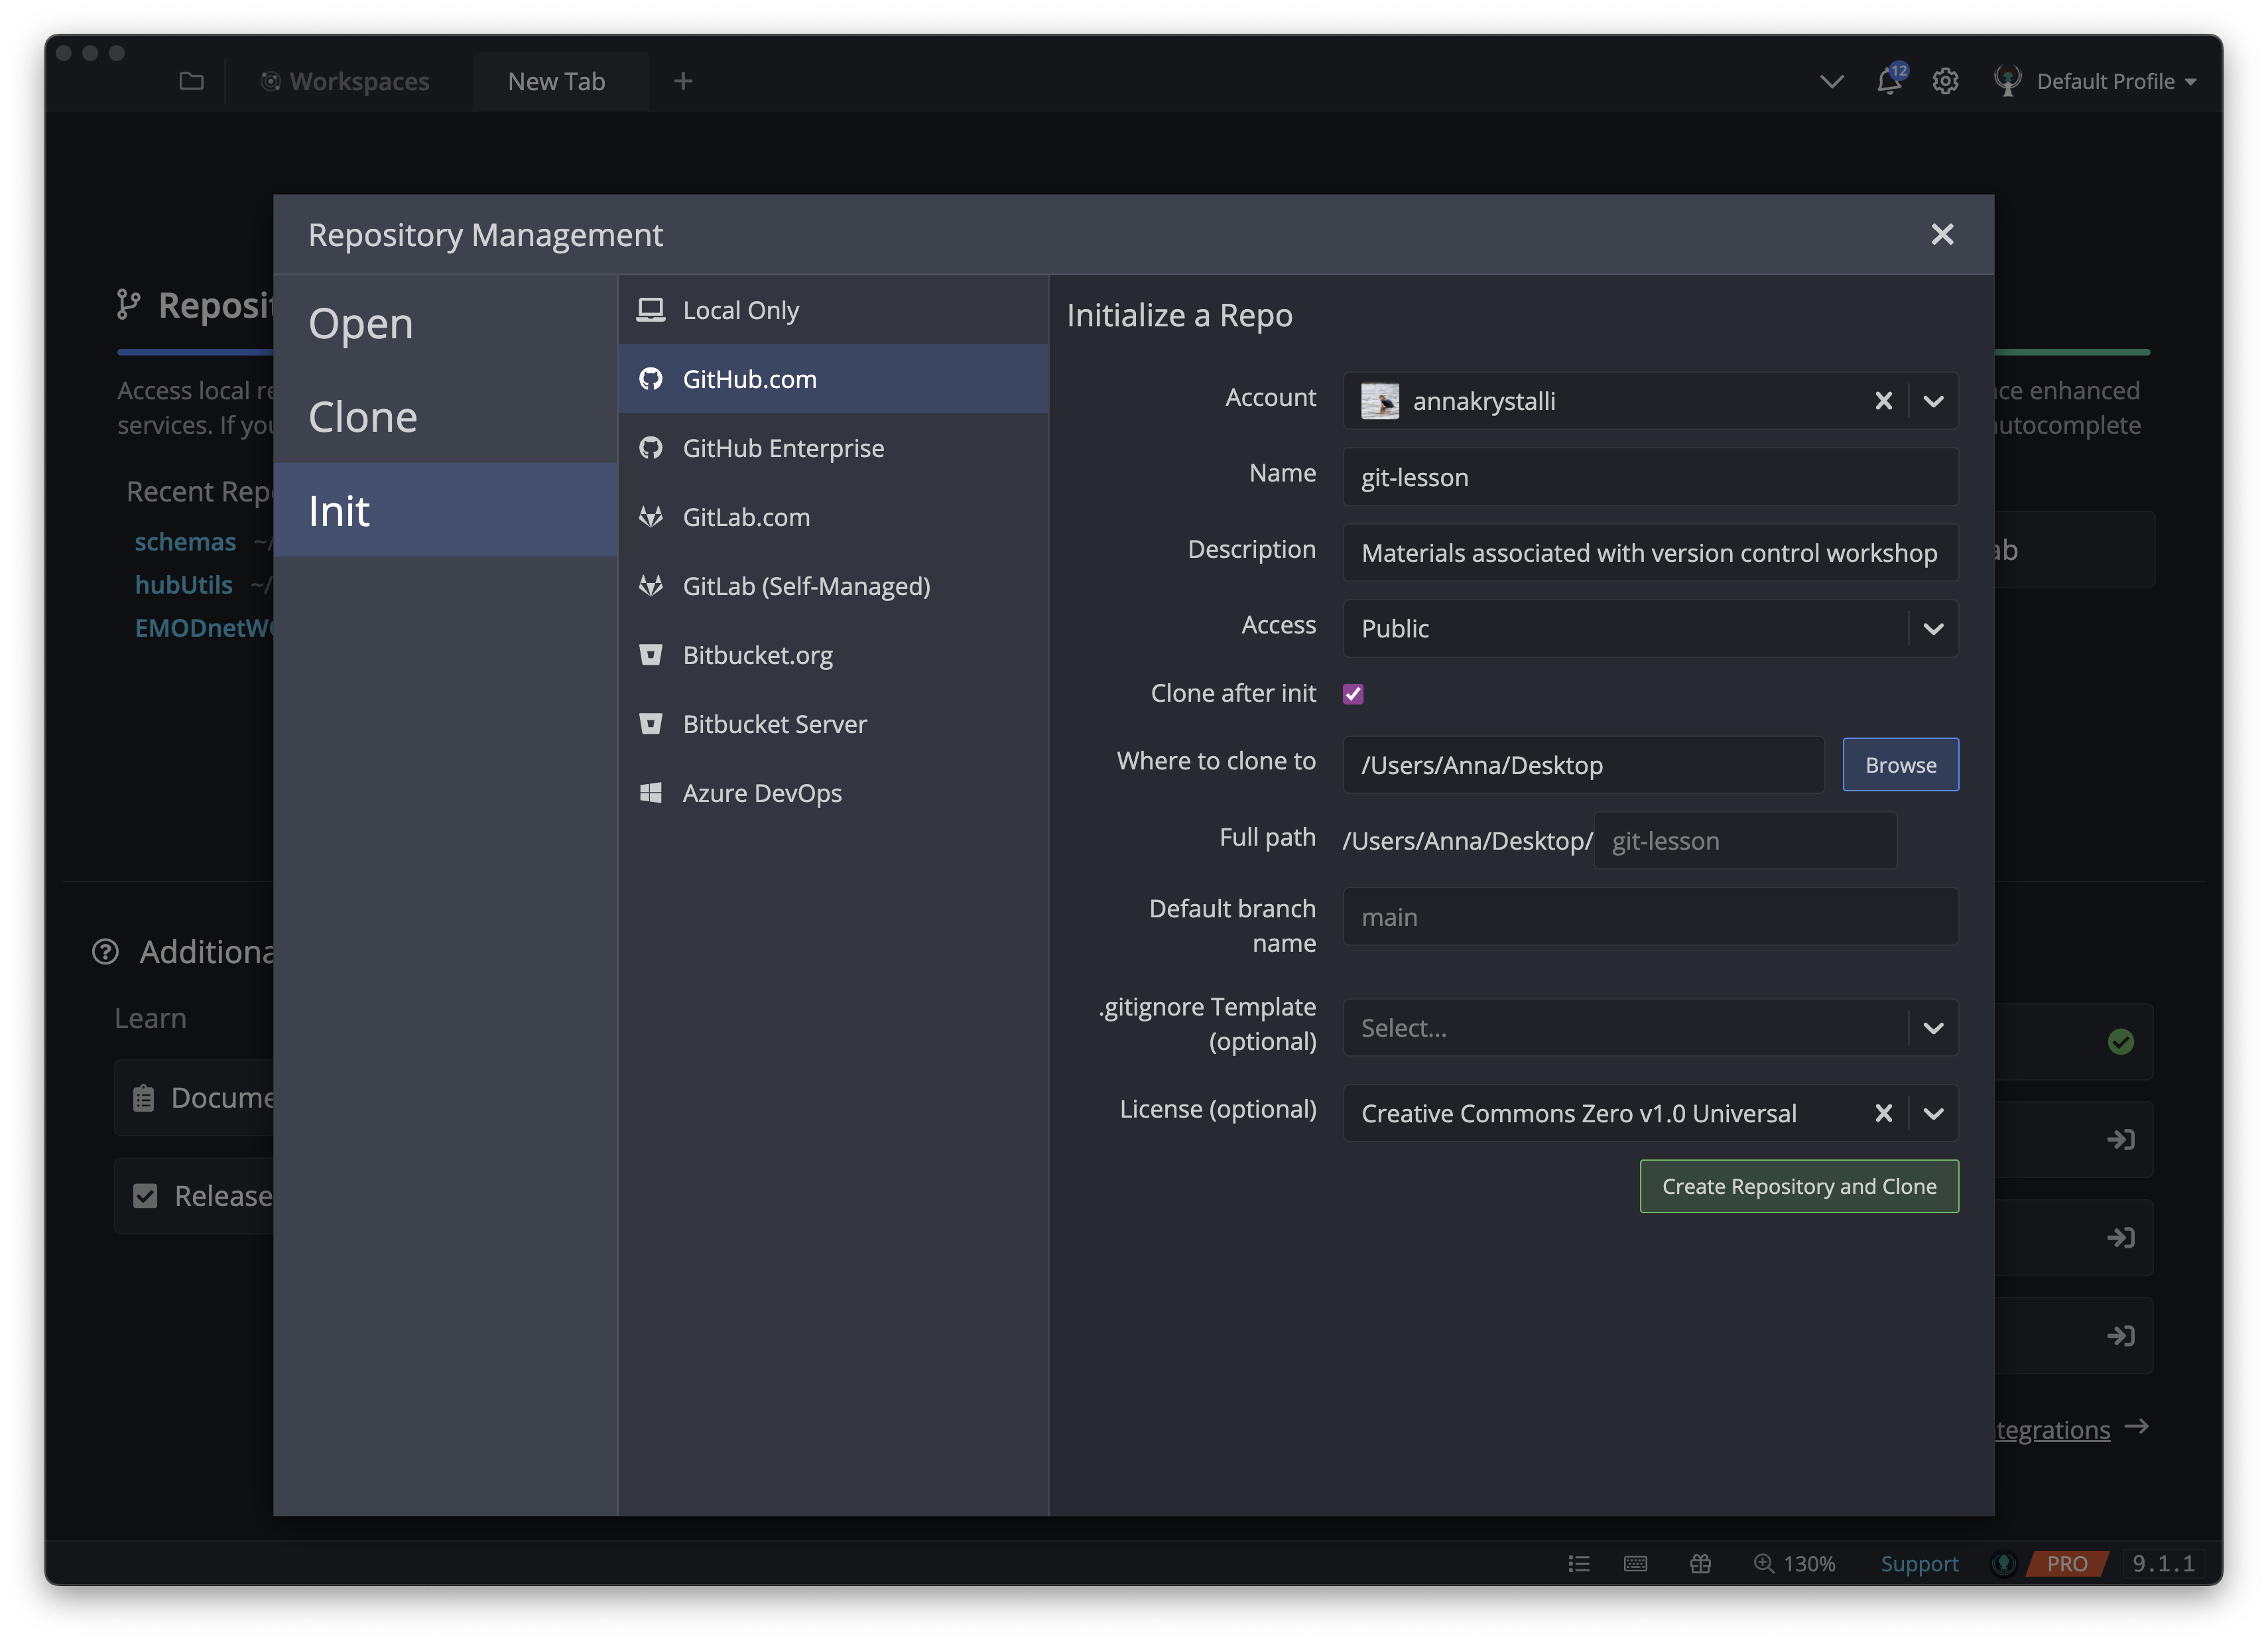
You will be presented with a new GUI with a bunch of options. To initialise a GitHub repository and create a local copy in one step, choose the GitHub.com option.
-
Account: The account in which you want the repository to be created under. This can be your account or an organization that you have access to.
-
Name: The name of the repository, let’s say
git-lesson. -
Description: Optional, but useful for giving a concise overview of a repository’s contents. I’m using
Materials associated with version control workshop. -
Access: Public or Private. Stick with Public.
-
Clone after init: This checkbox tells GitKraken Client to clone the resulting GitHub repository once initialised. This essentially creates a local copy of the repository at the path you specify next.
-
Where to clone to: Select the folder where the repository will be cloned to. I’m saving it to my Desktop (
/Users/Anna/Desktop). -
Full path: This is the auto-generated full path to the new repository. Mine is
/Users/Anna/Desktop/git-lesson -
Default branch name: Leave as
main. -
License: A license is mainly a list of permissions specifying how other people can use your code. For example you may want others to use your code but only if they accredited you. choosealicense.com can help you choose the right license. For open source code repositories MIT and GNU GPLv3 are usually appropriate licenses. For other types of materials,
Creative Commons Zero v1.0 (CC-0)is a more appropriate permissive license. Let’s useCreative Commons Zero v1.0 Universal.
-
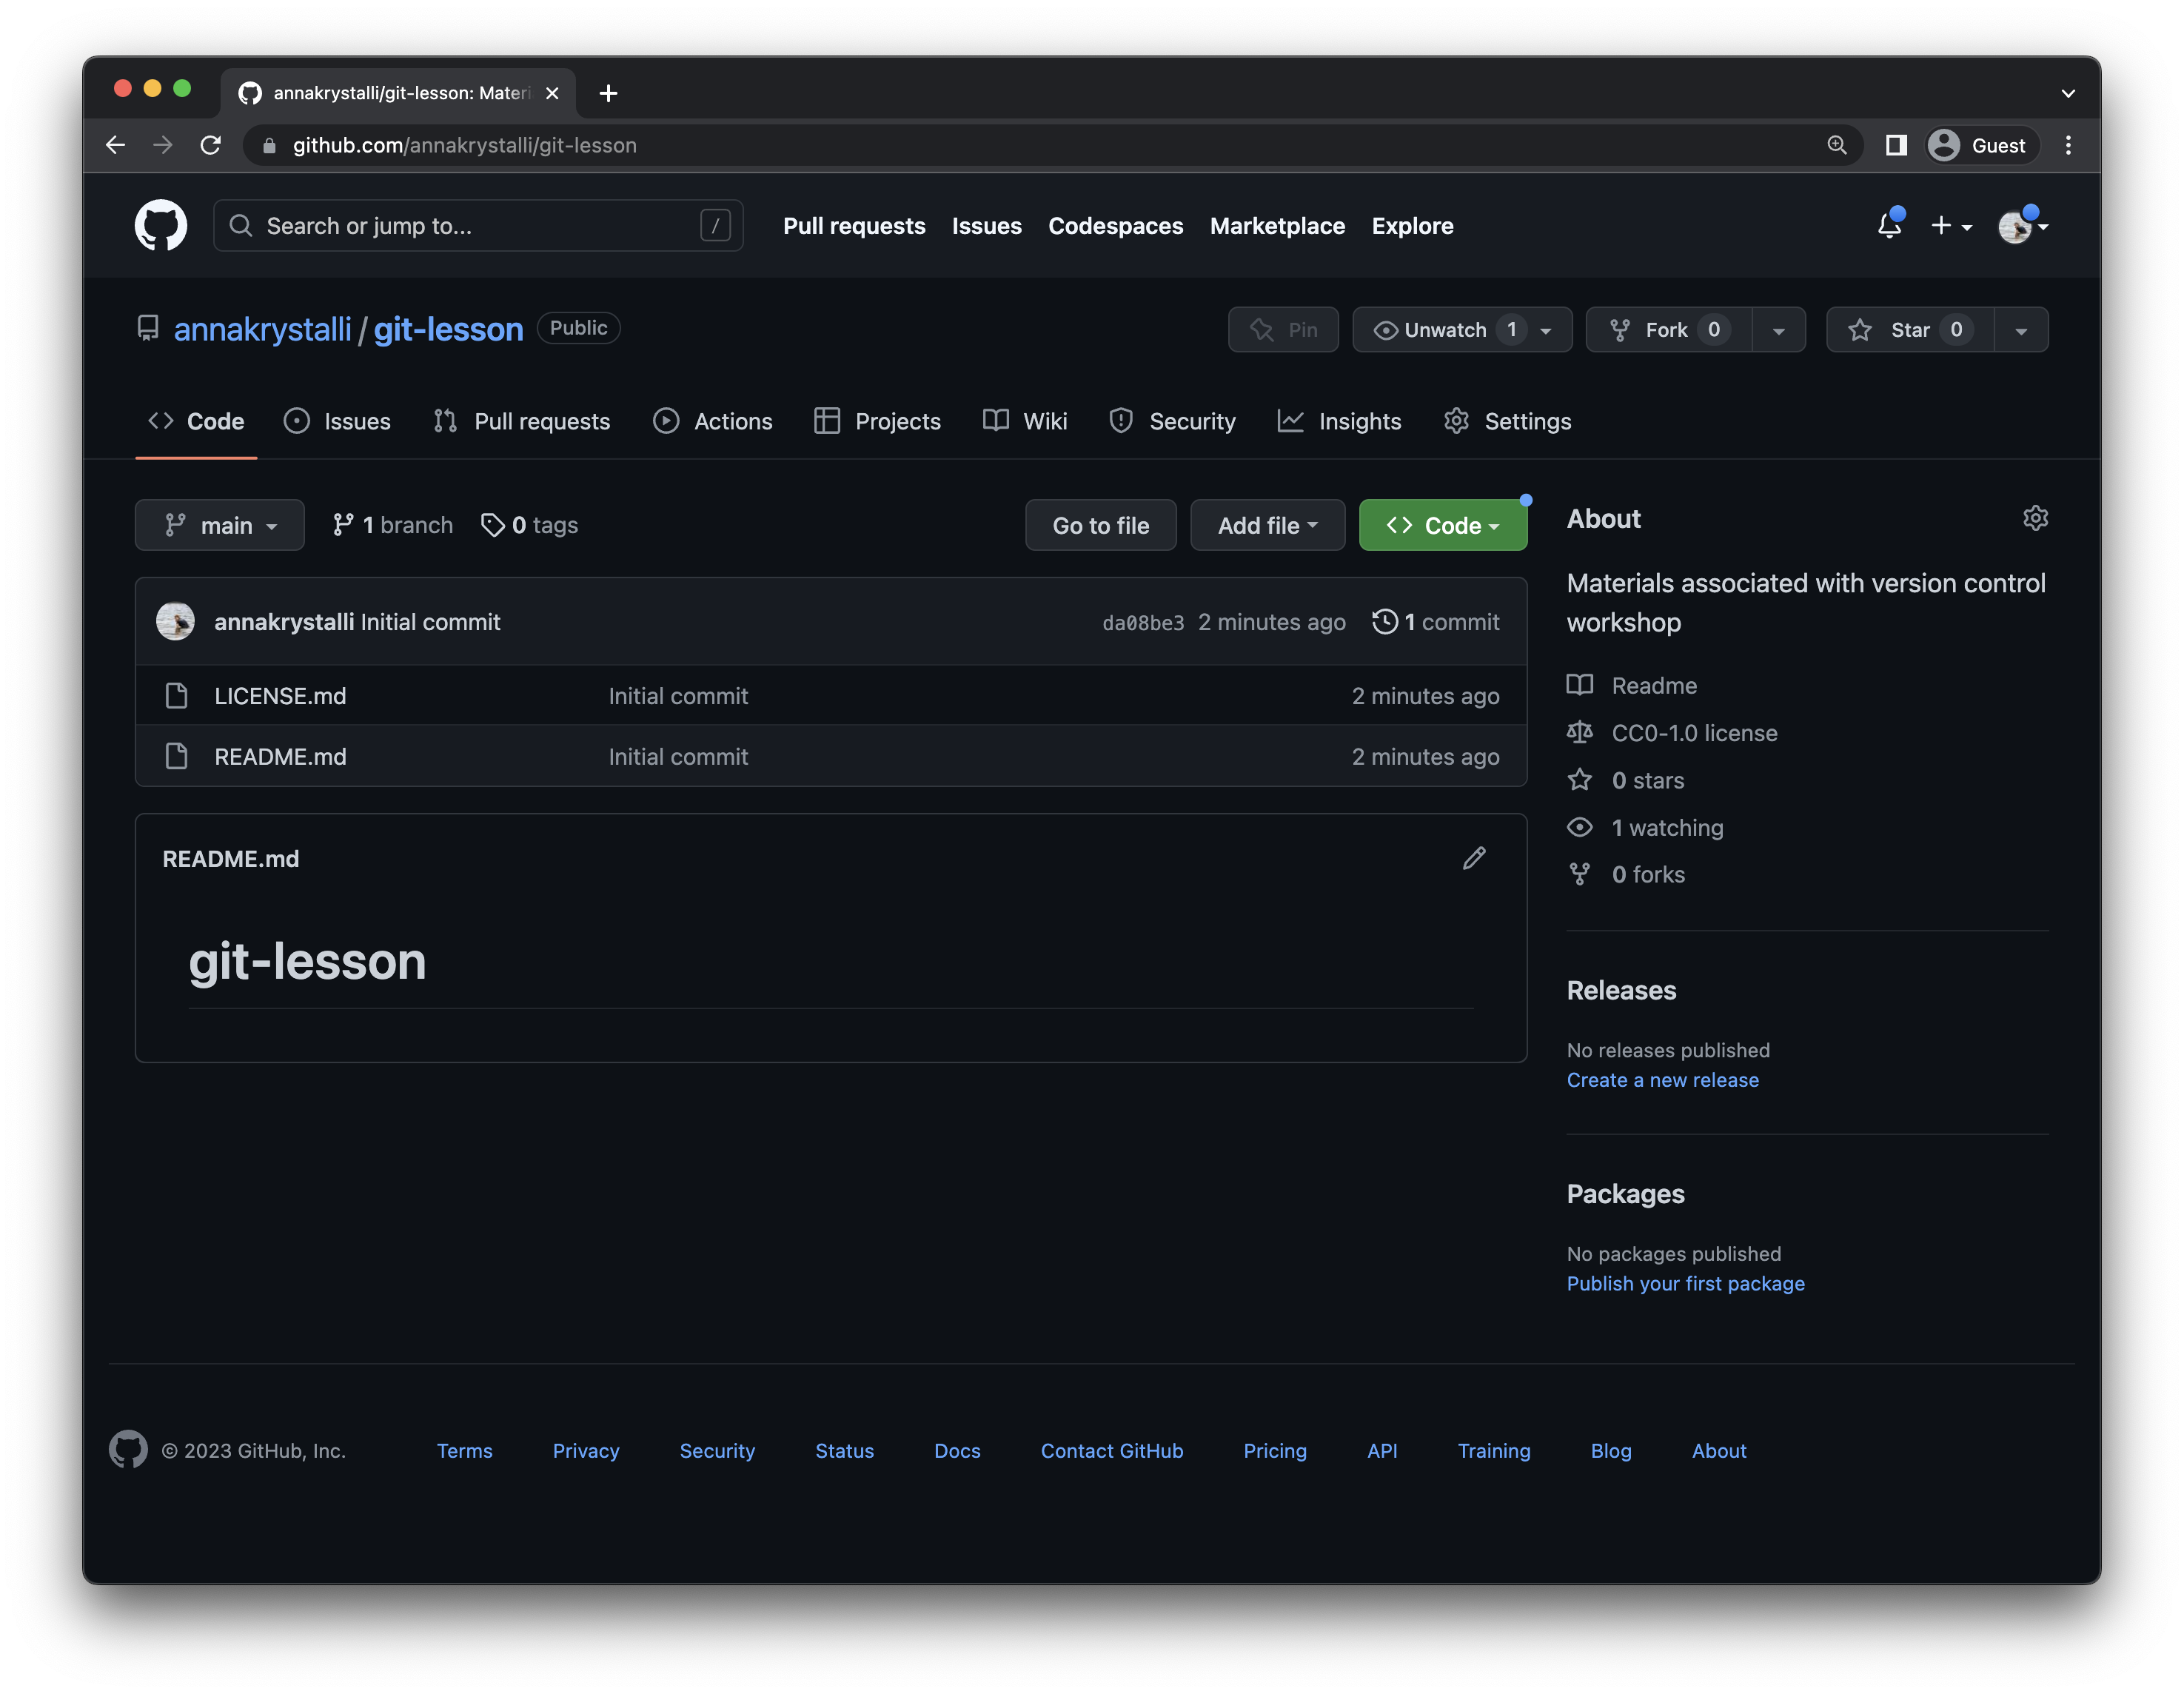
Let’s have a look!
The steps we just followed have created a repository on GitHub and cloned a local copy to our computers.
When creating the repository on GitHub:
- a
README.mdfile is automatically created. - The
LICENSE.mdfile we requested was created. - An initial commit of the two files was made automatically.
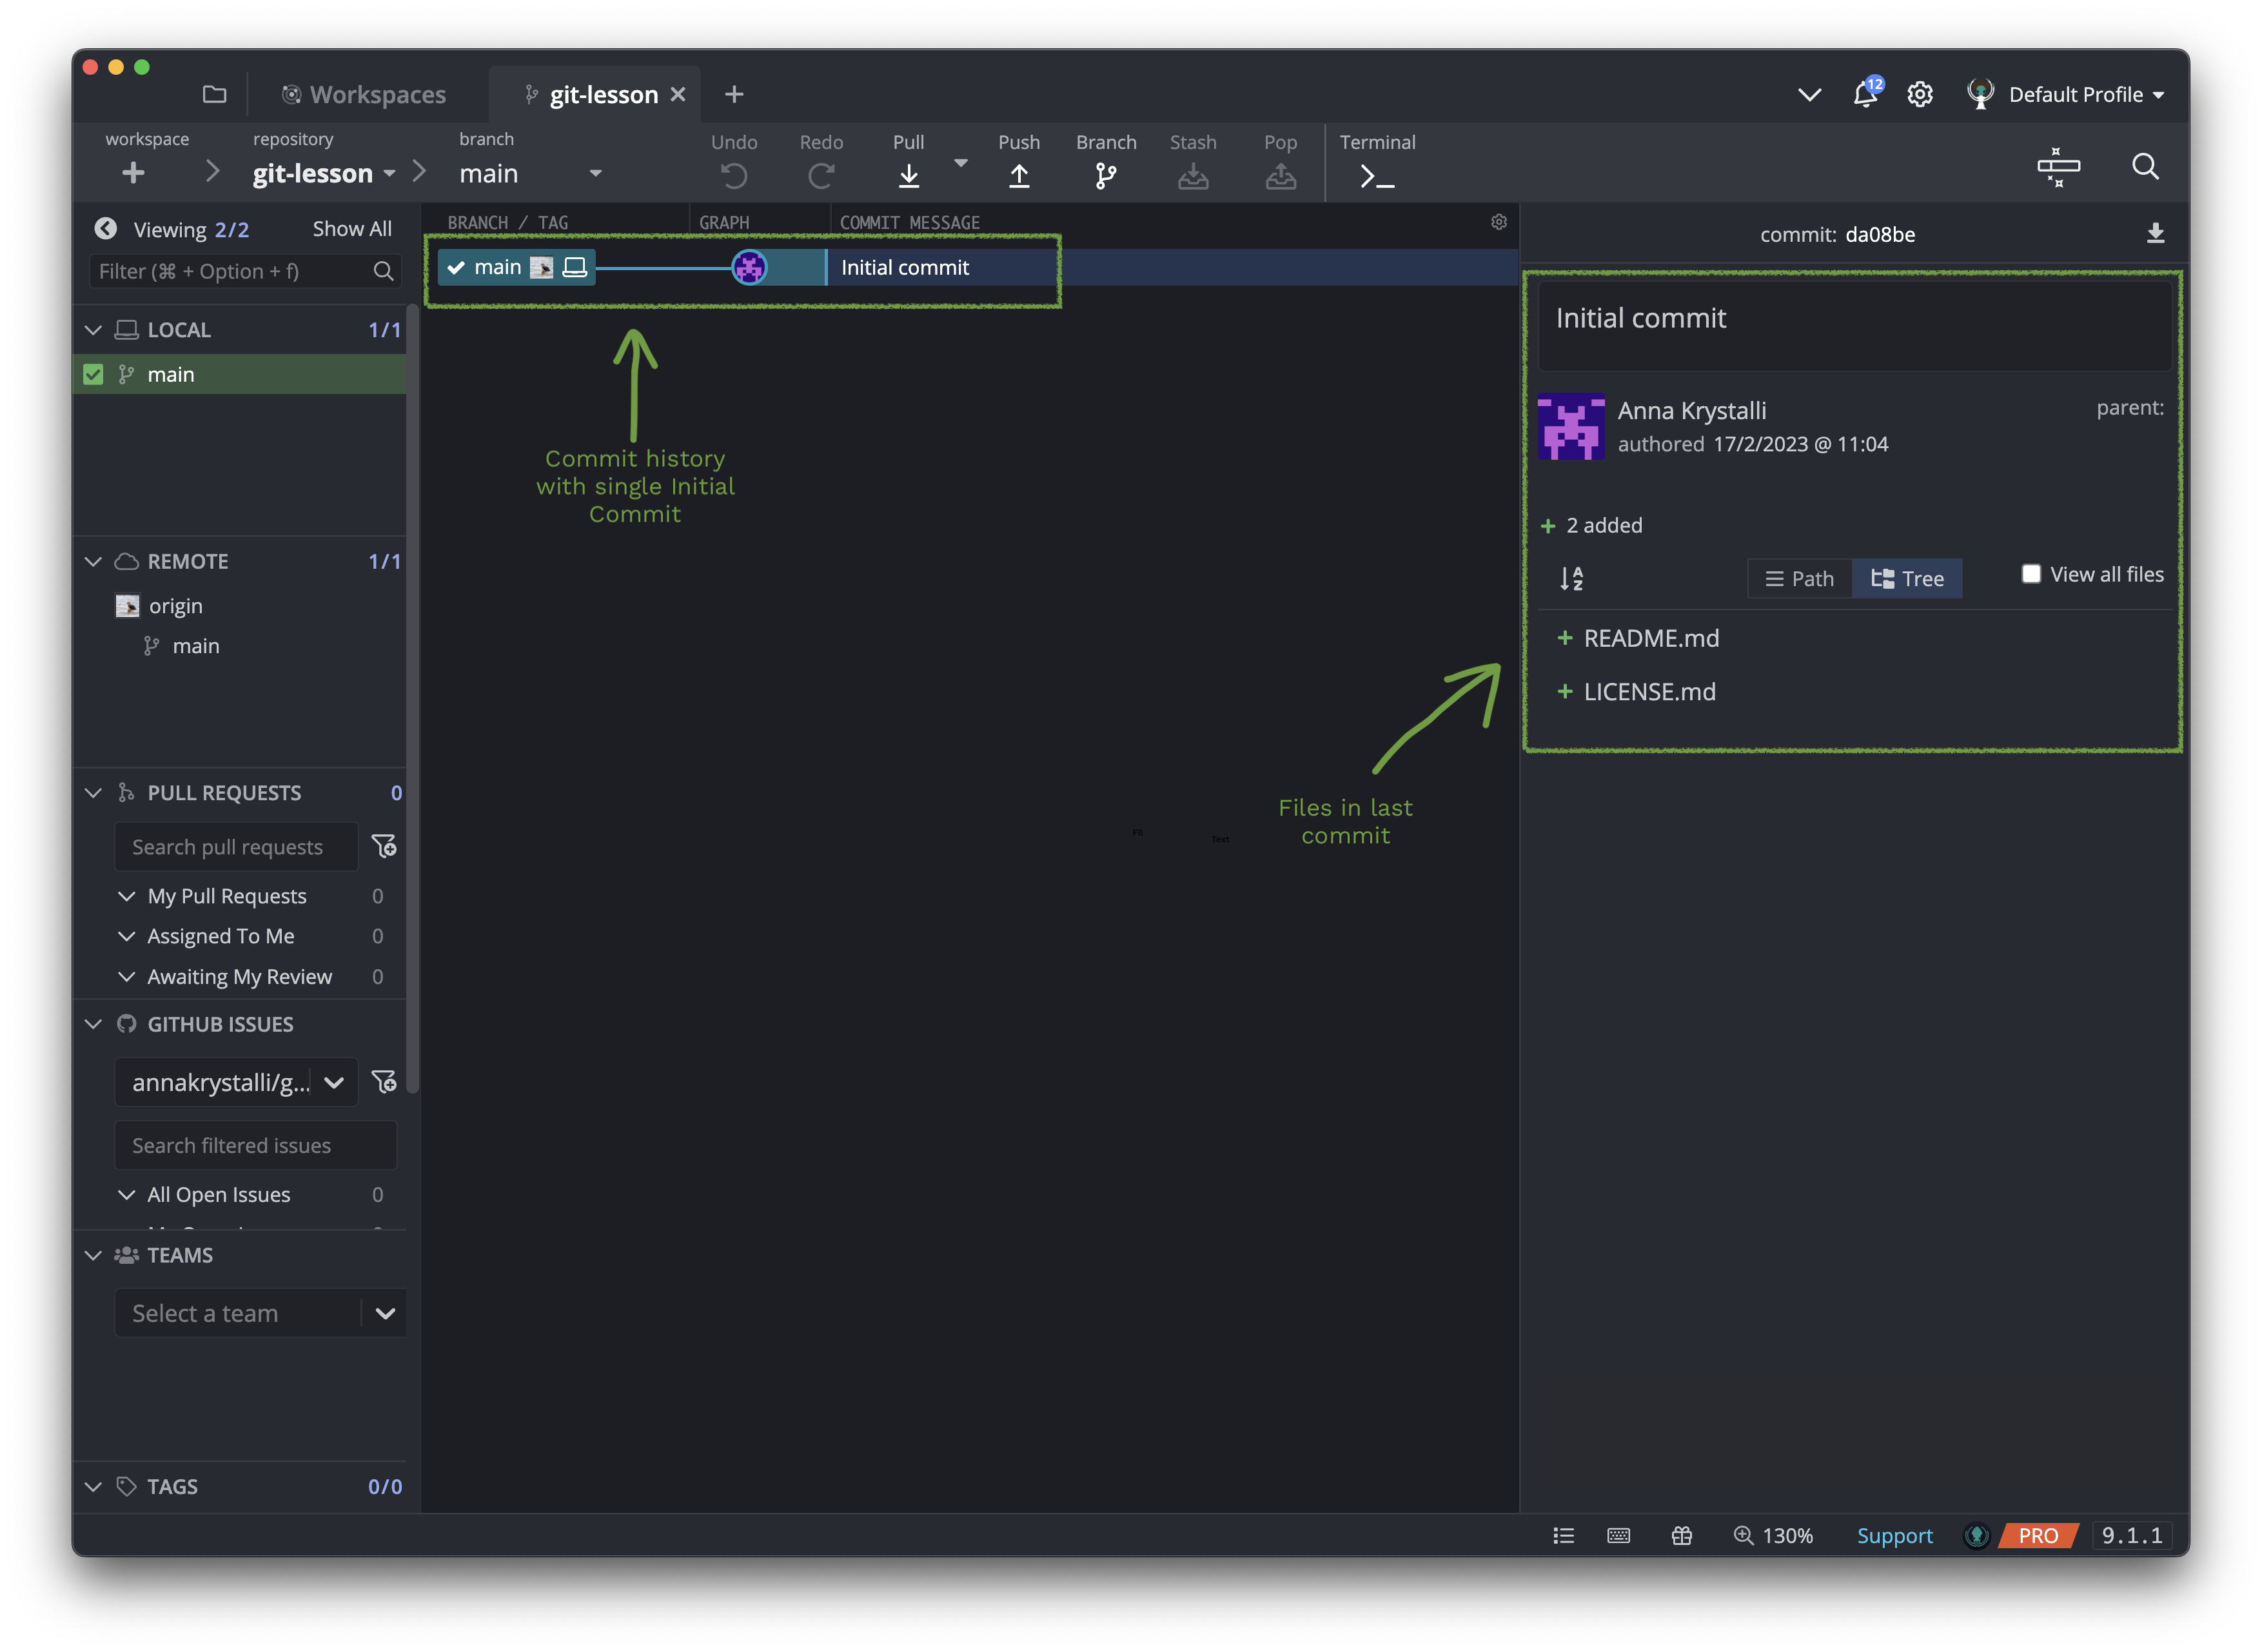
Local repository in GitKraken Client
What we’re looking at in GitKraken Client is our local repository.
- On the right hand panel we see the contents of the last commit (
Initial Commit). - In the central panel we see the repository’s commit history.
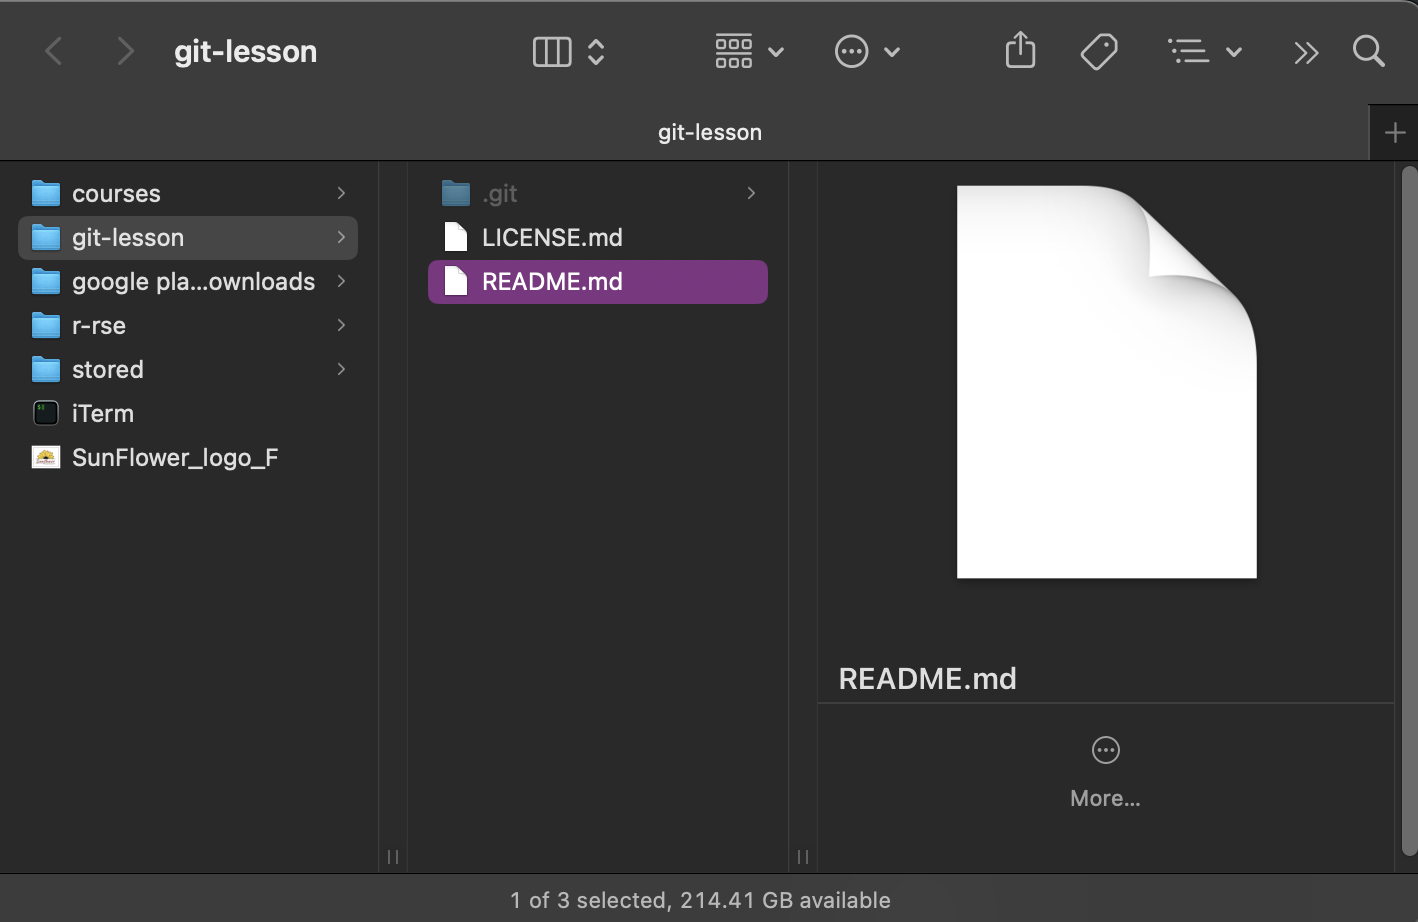
Local repository in our File System
To navigate to any file on our file system using our OS specific navigator, we can right click on any file in the commit panel (to view all files in the repository instead of just the files in the last commit tick the View all files box).
I’m on a macOS so I use the Finder program to view files on my file system. Choose the option appropriate for your system.
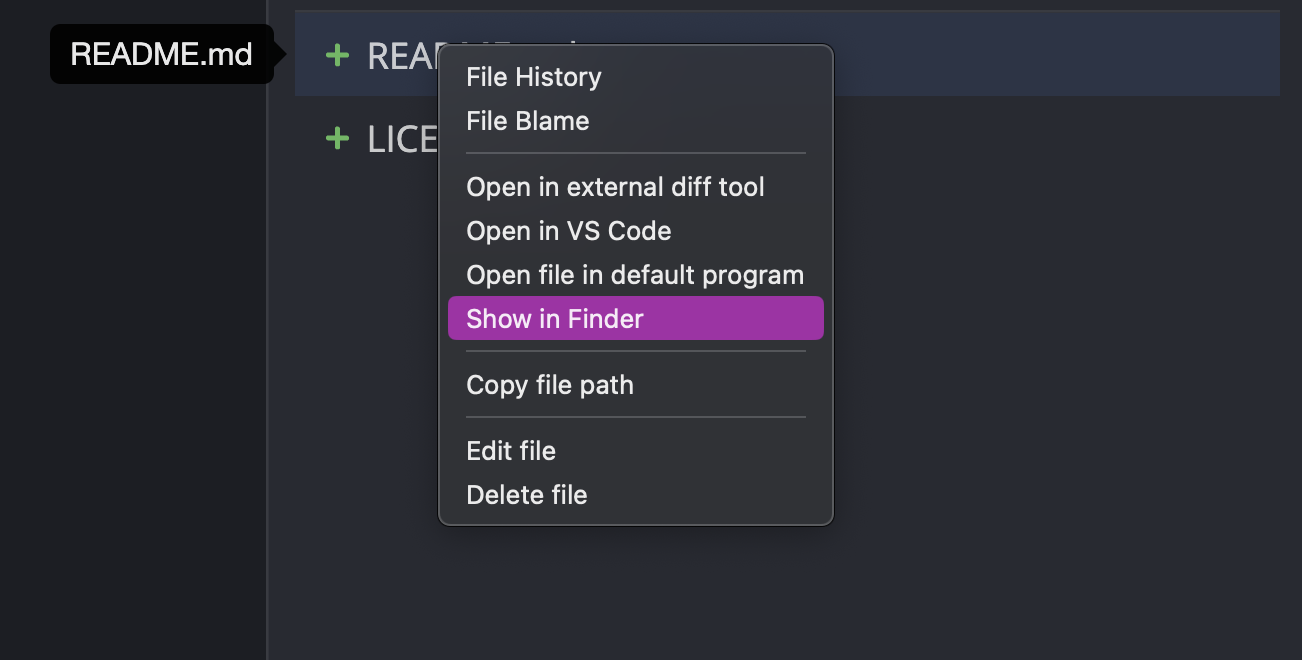
This will take you to the file on your local file system.
Remote repository on GitHub
Let’s also check out our repository on GitHub.
To do so, in the left hand panel, right click on origin under the REMOTE section and choose View origin on github.com
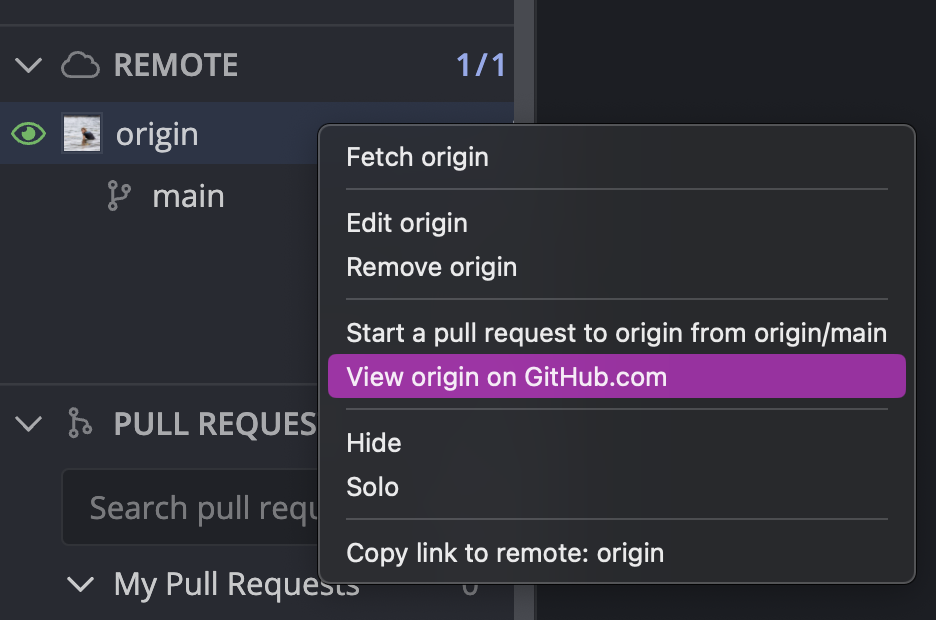
This launches our repository on GitHub in our browser: